
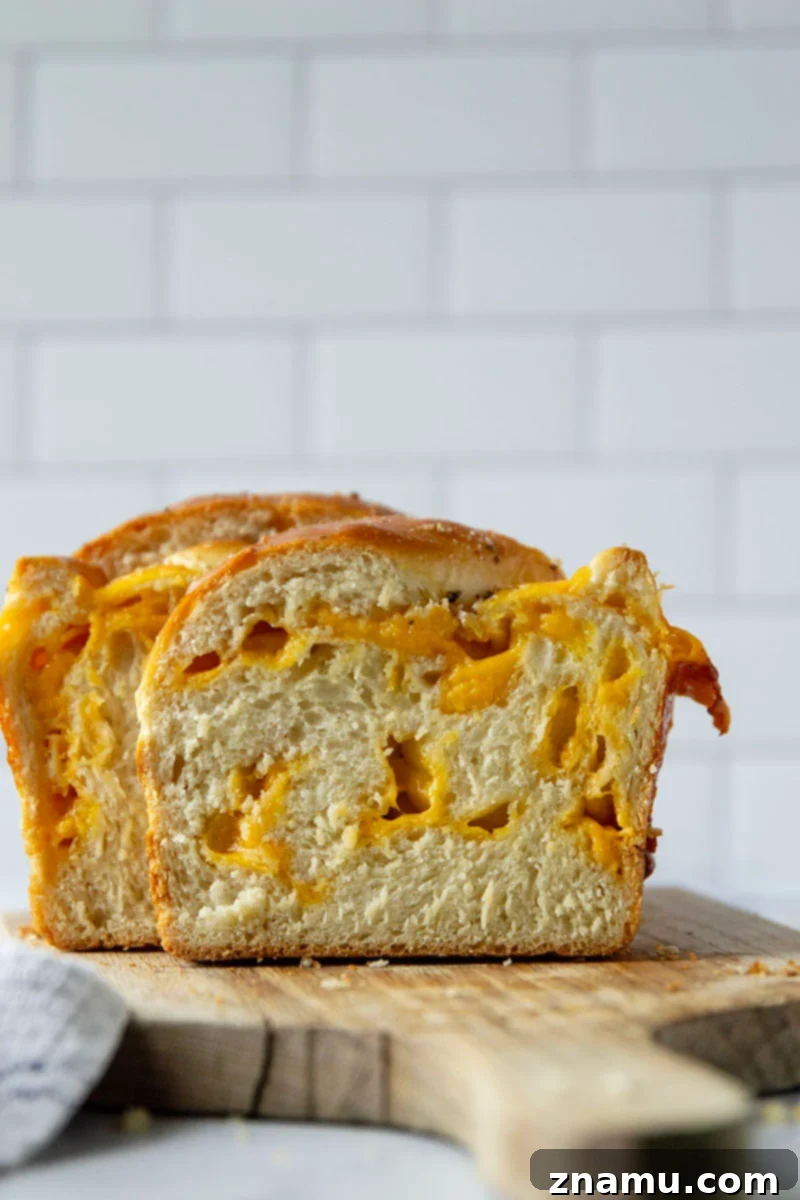
The Ultimate Homemade Cheese Bread Recipe: Soft, Fluffy, and Irresistibly Cheesy
Embark on a delightful baking journey with this easy-to-follow recipe for homemade cheese bread. Enjoy a perfectly soft and fluffy texture, generously swirled with pockets of warm, gooey cheddar cheese in every single bite.
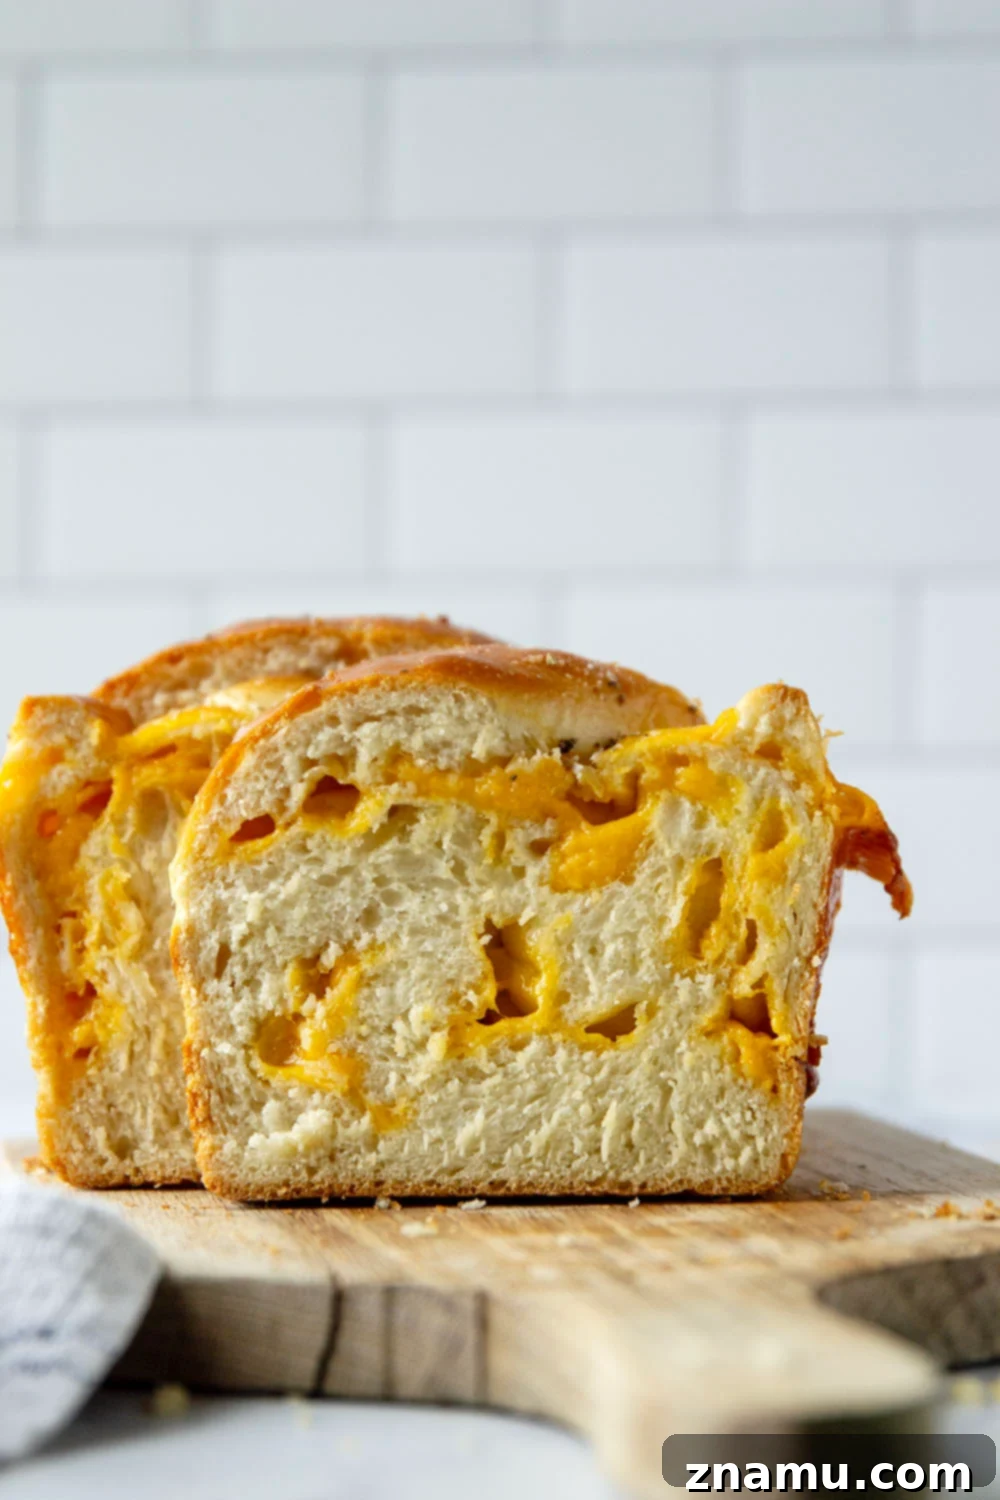
Is there anything quite as comforting and satisfying as a warm slice of bread? Absolutely. It’s a loaf of bread, still warm from the oven, with abundant, gooey pockets of rich cheese swirled throughout. This isn’t just any bread; it’s a culinary experience that elevates a simple staple into an extraordinary treat. While exploring a bustling farmer’s market in Madison, WI, I first encountered the legendary cheese bread that captivated my senses. That unforgettable taste sparked a quest to recreate its magic at home, leading to countless experiments and, finally, this perfected recipe. And frankly, after numerous trials and a few delightful tweaks, I believe this homemade version surpasses even my fondest market memories. Get ready to discover why this recipe will become your new favorite!
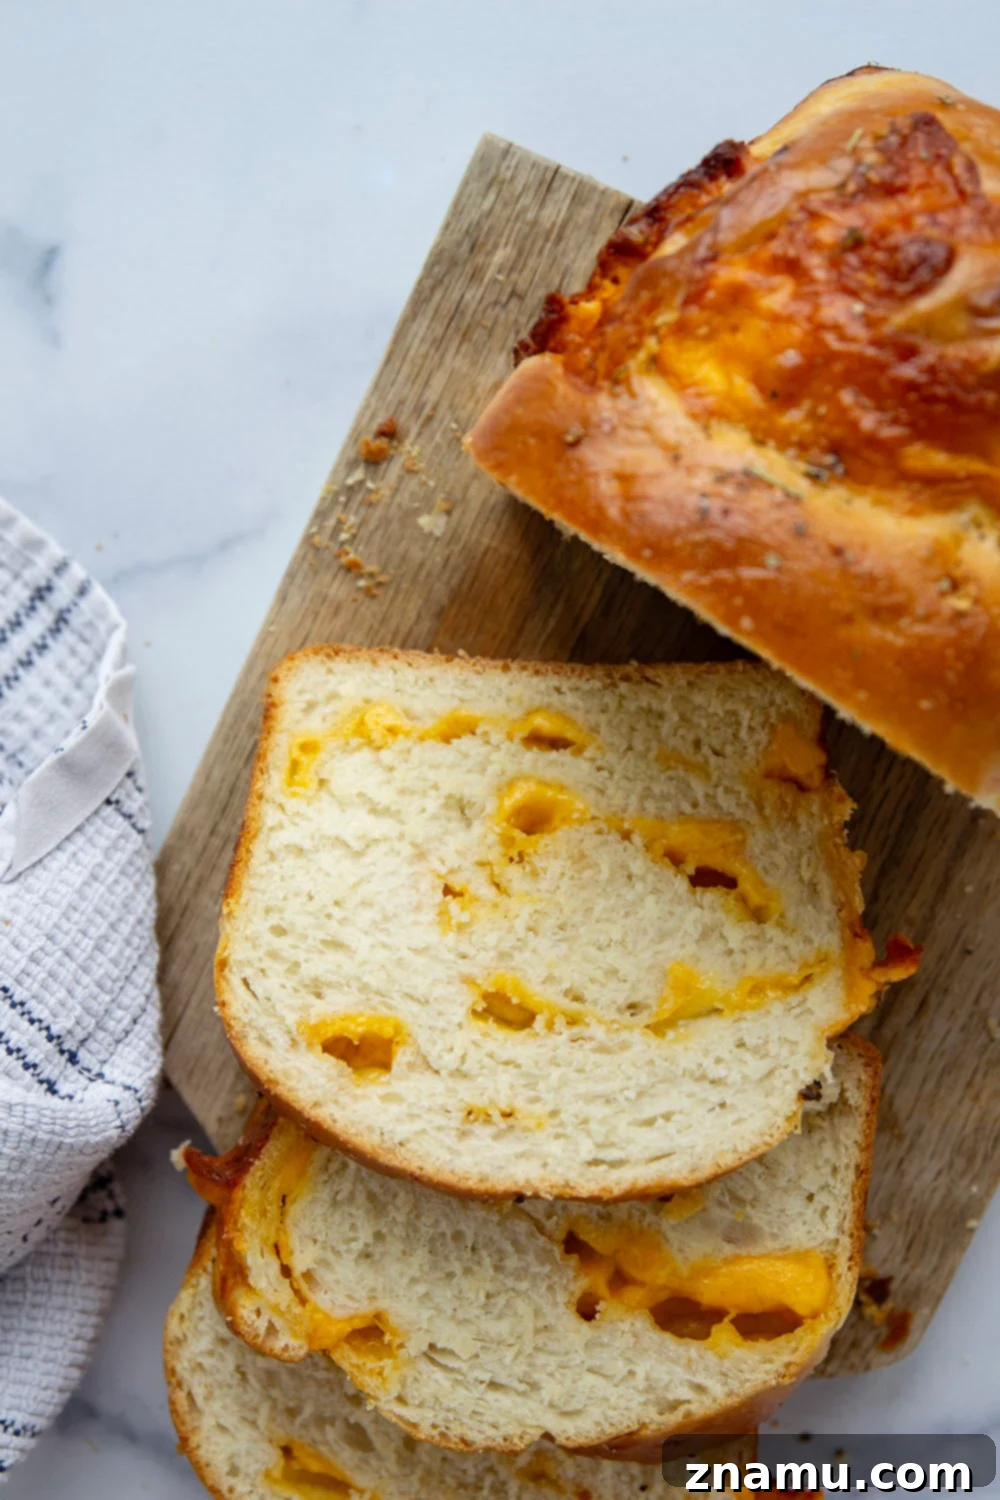
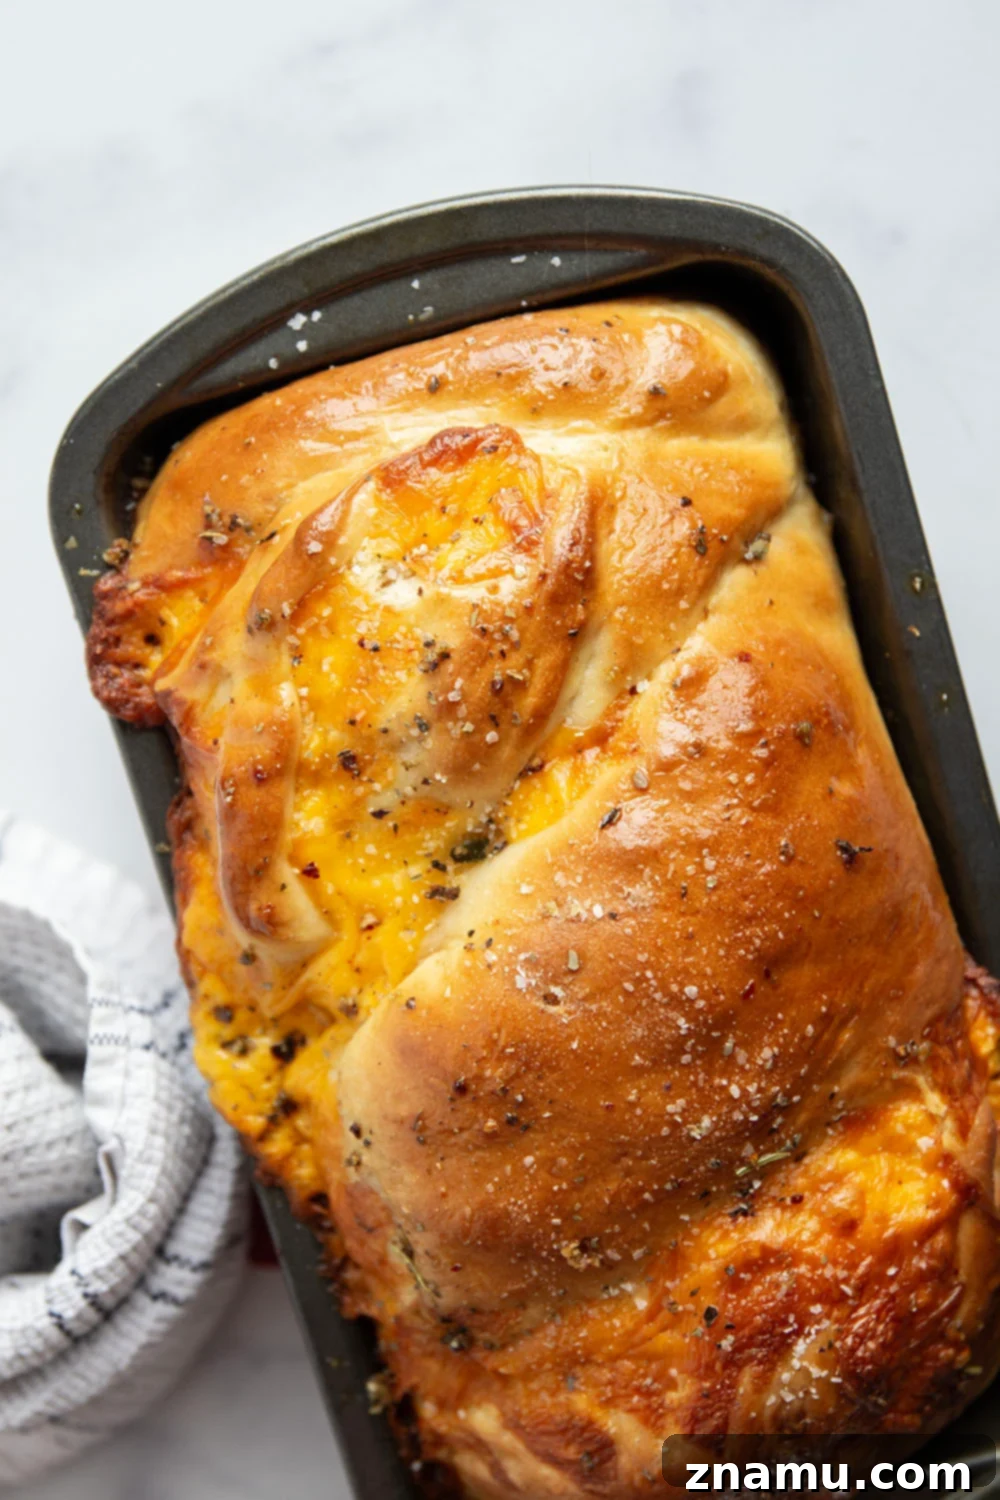
Just look at those incredible cheddar swirls! The sheer quantity of molten cheese woven into every fiber of this bread feels almost decadent. Each bite offers an explosion of savory flavor and a delightful texture contrast, making it undeniably dynamite. And seriously, don’t even get me started on the pure bliss of enjoying a thick slice of this cheese bread, still warm, with a whisper of salty butter melting into its soft interior. It’s pure carb heaven, a moment of culinary perfection that truly must be experienced to be believed.
Why You’ll Fall in Love with This Homemade Cheese Bread
This isn’t just another bread recipe; it’s a testament to simple ingredients yielding spectacular results. Our homemade cheese bread stands out with its unique blend of textures and flavors, making it an instant crowd-pleaser and a staple for any occasion. Here’s what makes it truly exceptional:
- A remarkably soft and fluffy texture that practically melts in your mouth, a hallmark of perfectly leavened and kneaded dough.
- Irresistible pockets of intensely flavorful cheddar cheese, strategically swirled throughout the loaf for a delightful gooey surprise in every bite.
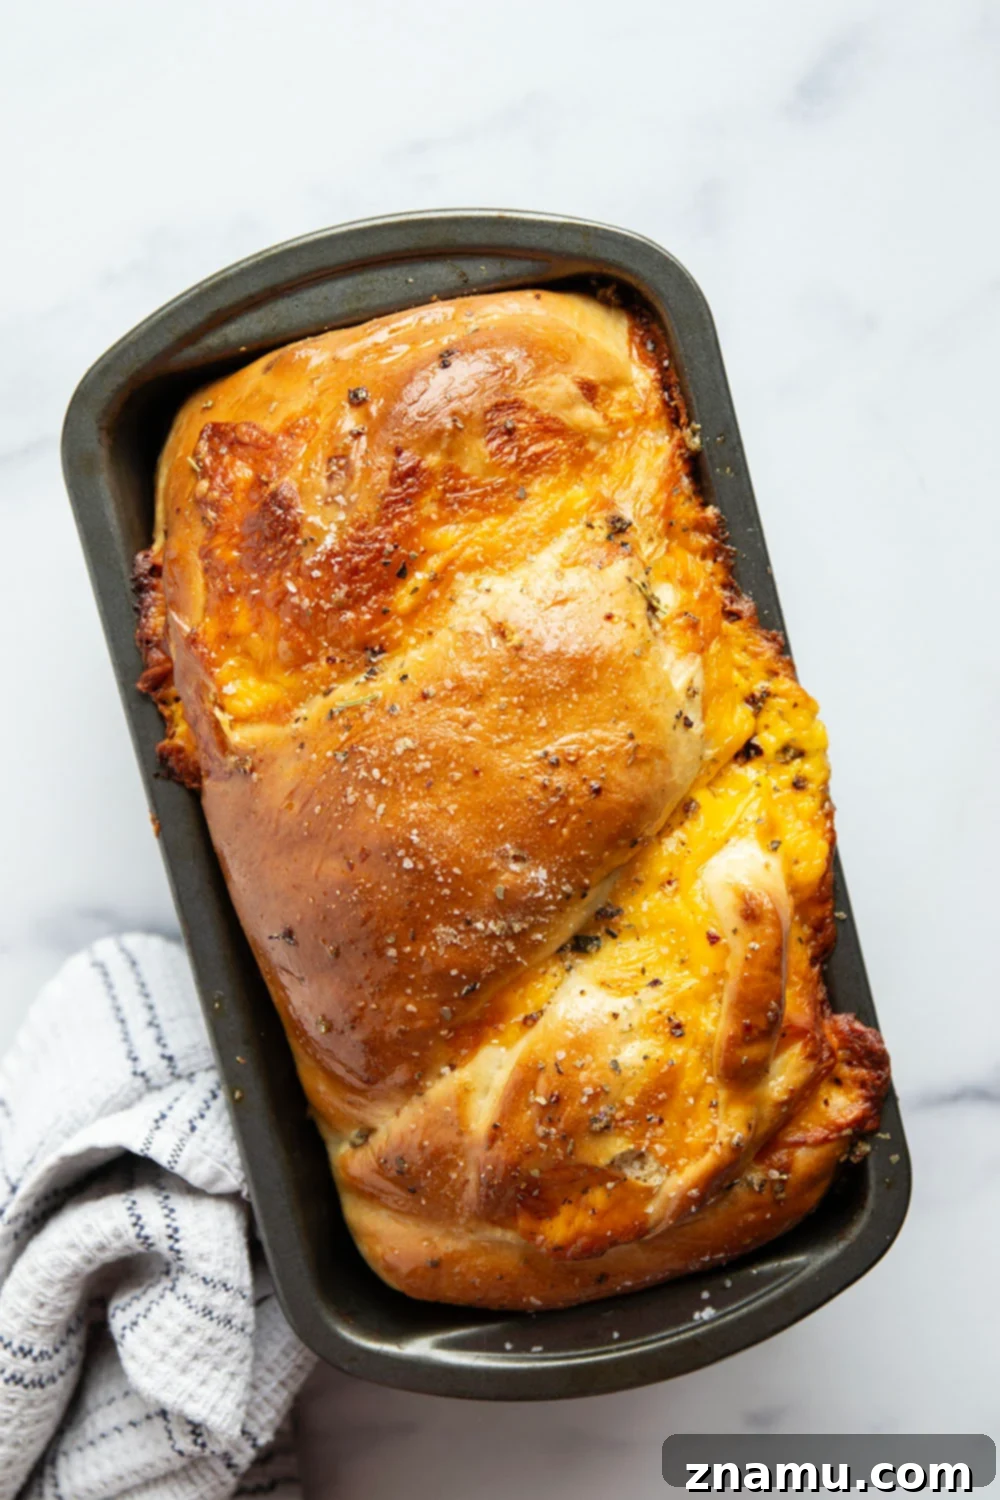
- A fragrant and savory garlic herb butter delicately brushed over the top, creating a golden crust and infusing the bread with an aromatic finish.
Baking Your Own Irresistible Cheese Bread: A Step-by-Step Guide
Creating this magnificent cheese bread from scratch is a rewarding and surprisingly straightforward process. Even if you’re new to baking with yeast, our detailed instructions and helpful tips will guide you every step of the way to a perfectly baked loaf. Prepare to impress yourself and your loved ones!
Essential Ingredients for Your Cheesy Masterpiece
Gathering the right ingredients is the first step towards a successful bake. Each component plays a crucial role in developing the incredible flavor and texture of this homemade cheese bread.
- Water: The foundation for activating your yeast. Ensure it’s the right temperature!
- Active Dry Yeast: The magic behind the bread’s incredible rise and fluffy texture.
- Honey: Feeds the yeast, adding a subtle sweetness and enhancing the bread’s golden hue. Agave nectar also works beautifully.
- Egg: Contributes to the richness, tender crumb, and overall structure of the dough.
- Unsalted Butter: Adds moisture, flavor, and helps achieve that desirable soft texture.
- Kosher Salt: Balances the flavors and strengthens the gluten structure.
- Bread Flour: Higher in protein, it’s essential for developing the strong gluten needed for a chewy, airy bread.
- Cheddar Cheese: The star of the show! Cubed cheddar melts perfectly into gooey pockets.
- Garlic: Infuses the herb butter with a pungent, savory aroma.
- Italian Seasoning: A blend of classic herbs that complements the garlic butter beautifully.
The Art of Shaping: Creating Those Perfect Cheese Swirls
Shaping your cheese bread might seem intimidating, but it’s actually a fun and creative part of the process. Follow these visual and textual steps to create a beautiful, swirled loaf that’s as stunning to look at as it is delicious to eat. The goal is to evenly distribute the cheese and create a tight roll that will bake into those irresistible gooey pockets.
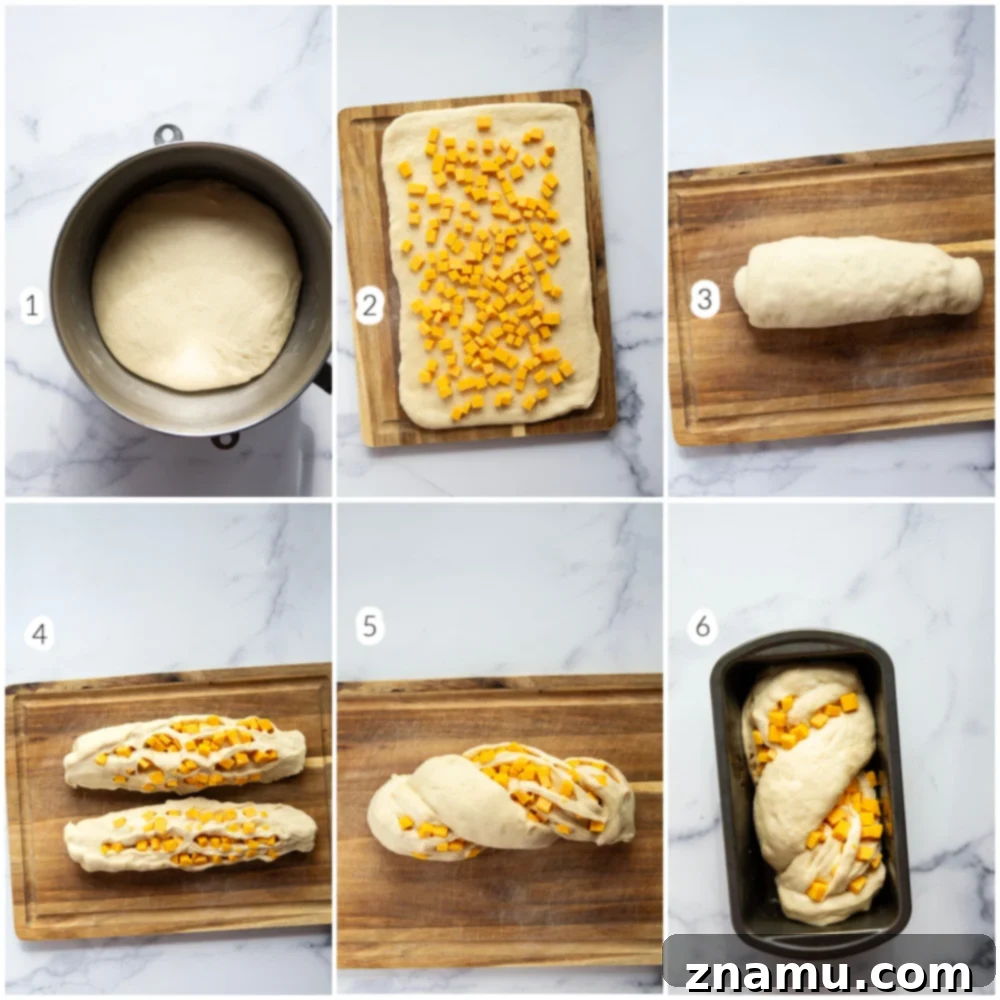
- Once your dough has completed its first rise, gently **punch it down** to release the air, then turn it onto a lightly floured surface.
- Using a rolling pin, **roll the dough into a precise 9×15 inch rectangle**. Aim for an even thickness across the entire surface.
- **Generously sprinkle your prepared cheddar cheese cubes** over the entire surface of the dough rectangle, leaving a small border at one of the longer edges to help seal the roll.
- Beginning from the longer edge opposite the border, **tightly roll the dough up** into a log. Ensure the roll is firm and even.
- Using a sharp knife, **carefully cut the dough log in half vertically**, down the center, exposing the beautiful cheese layers within.
- **Twist the two halves together tightly**, intertwining them to create a braided appearance. Pinch the ends firmly to seal in the cheese.
- **Gently transfer the twisted loaf** into a greased 9×15 inch loaf pan, tucking the ends neatly underneath for a clean finish.
Expert Tips for Baking Perfectly Fluffy Cheese Bread Every Time
Achieving a truly outstanding loaf of cheese bread isn’t just about following the steps; it’s about understanding the nuances of baking. These expert tips will help you master the craft, ensuring your homemade cheese bread is consistently soft, fluffy, and bursting with cheesy goodness.
- Measure Flour Correctly: The Spoon-and-Level Technique
Precision in flour measurement is paramount for successful bread baking. Avoid scooping flour directly with your measuring cup, as this compacts it and can lead to over-measuring, resulting in a dense, dry bread. Instead, use a spoon to lightly scoop flour into your measuring cup until it’s overflowing. Then, use the back of a straight knife or a flat edge to level off the excess flour. This technique ensures you have the correct amount, leading to a perfectly tender crumb. - Optimal Water Temperature for Yeast Activation (105-115°F)
Yeast is a living organism, and its activity is highly dependent on temperature. The ideal temperature range for activating active dry yeast is between 105°F and 115°F (40°C-46°C). Water that’s too hot will kill the yeast, preventing your dough from rising, while water that’s too cold will inhibit its activity, leading to a very slow or stalled rise. A kitchen thermometer is your best friend here, ensuring perfect yeast activation and a robust rise. - Master the Art of Kneading for Gluten Development
Kneading is the crucial step where gluten — the protein network responsible for the bread’s structure, elasticity, and chewiness — is developed. Whether you knead by hand or with a stand mixer fitted with a dough hook, aim for a dough that feels smooth, elastic, and passes the “windowpane test” (where a small piece of dough can be stretched thin enough to see light through it without tearing). Proper kneading ensures your cheese bread will have that desirable soft, airy, and fluffy texture. - Create a Warm Environment for Optimal Dough Rising
Yeast dough thrives in warmth. A consistent temperature of 75°F-80°F (24°C-27°C) is ideal for efficient rising. If your kitchen is cool, consider these tricks: place the covered bowl in a slightly warm (but *not* hot) oven that’s been turned off, near a sunny window, or on top of a warm appliance. A good rise is key to a light and airy loaf. - Utilize the Picture Tutorial for Effortless Shaping
Shaping the dough into a beautiful, swirled loaf is easier with visual guidance. Don’t hesitate to refer back to the step-by-step picture tutorial above. It provides clear images that complement the written instructions, helping you confidently execute the rolling, sprinkling, cutting, and twisting techniques to perfection. - Opt for Cubed Cheddar for Superior Swirls
While shredded cheese is convenient, cheddar cubes are highly recommended for this recipe. Cubes tend to hold their shape better during the rolling and twisting process, preventing them from scattering or creating too much moisture release that can compromise the dough. This results in more defined, distinct, and gloriously gooey cheese pockets throughout your bread. - Prevent Over-Browning with Tin Foil
Bread, especially with cheese, can sometimes brown on the exterior faster than it cooks through internally. If you notice your loaf is getting too dark too quickly (usually around the 20-25 minute mark), simply tent it loosely with a sheet of aluminum foil. This will protect the crust from further browning while allowing the inside to finish baking to perfection. - Confirm Doneness with an Internal Temperature Check (190-200°F)
The most reliable way to ensure your cheese bread is perfectly baked through is by checking its internal temperature with a kitchen thermometer. The bread is fully cooked when it registers between 190°F and 200°F (88°C-93°C) in the center. This guarantees a safe, thoroughly baked, and delightfully textured loaf.
Delicious Variations to Customize Your Cheese Bread
While the classic cheddar cheese bread is phenomenal on its own, this recipe is incredibly versatile. Don’t be afraid to experiment with these exciting variations to tailor the bread to your taste or to try something new!
- Explore Different Cheeses: Instead of, or in addition to, cheddar, try sharp cheddar for a more intense flavor, smoky gouda for a sophisticated twist, spicy pepper jack for a kick, or mild mozzarella for extra meltiness. A blend of cheeses can also create a complex flavor profile.
- Boost the Garlic Factor: For garlic lovers, elevate the flavor by sprinkling 2-3 cloves of finely crushed or minced fresh garlic over the cheddar cheese before rolling the dough. This will infuse the interior of the bread with even more aromatic garlic goodness.
- Add More Herbs: Beyond Italian seasoning, consider adding fresh herbs like finely chopped rosemary, chives, or thyme to the dough or the garlic herb butter for an enhanced aromatic experience.
- Introduce Savory Mix-Ins: Elevate your cheese bread with other savory additions. Crispy bacon bits, finely diced jalapeños (for a spicy kick), sun-dried tomatoes (chopped), or even caramelized onions can be sprinkled over the cheese before rolling.
- Make it a Sweet & Savory Delight: For a surprisingly delicious contrast, add a tablespoon of brown sugar to the dough along with the honey. The subtle sweetness beautifully complements the sharp cheddar.
- Toast and Serve: Thick slices of this cheese bread are incredible when lightly toasted. Top with extra softened butter, fresh tomato slices, a sprinkle of black pepper, or even a fried egg for a gourmet breakfast.
Storing and Freezing Your Homemade Cheese Bread for Lasting Freshness
The absolute best way to enjoy this homemade cheese bread is undoubtedly fresh from the oven, when the cheese is perfectly melty and the crust is wonderfully crisp. However, if you have leftovers (a rare occurrence!), or wish to bake ahead, proper storage ensures you can savor its deliciousness later.
To store, allow the bread to cool completely before transferring it to an airtight container or wrapping it tightly in plastic wrap. It will remain fresh and delicious at room temperature for up to 4 days. For optimal enjoyment, gently reheat slices in a toaster oven or microwave before serving to revive that soft texture and gooey cheese.
Freezing is an excellent option for long-term storage, allowing you to enjoy homemade goodness whenever a craving strikes. Once the bread has cooled completely, wrap the entire loaf (or individual slices) very well in plastic wrap, followed by a layer of aluminum foil to prevent freezer burn. It can be frozen for up to 2 months. For the best quality, try to freeze the bread on the same day it was baked to seal in peak freshness.
When you’re ready to enjoy, simply allow the frozen bread to thaw completely on your countertop. Once thawed, you can reheat the entire loaf at 350°F (175°C) for 10-15 minutes, or individual slices in a toaster oven, until warmed through and the cheese is soft again.

Serving Suggestions for Your Savory Cheese Bread
This versatile cheese bread isn’t just a side dish; it can be the star of many meals! Its rich flavor and satisfying texture make it perfect for various culinary applications:
- Alongside Soups and Stews: The ultimate companion to a hearty bowl of chili, a creamy tomato soup, or a robust beef stew. Its ability to soak up delicious broths is unmatched.
- Gourmet Sandwiches: Elevate your lunch! Use thick slices for an incredible grilled cheese sandwich, a savory turkey and cheddar melt, or a gourmet vegetarian panini.
- Breakfast or Brunch: Serve it toasted with scrambled eggs, bacon, or a dollop of cream cheese and chives for a decadent start to your day.
- Appetizer with Dips: Cut into cubes or thick slices and serve warm with marinara sauce, pesto, or a savory herb dip for an impressive appetizer at gatherings.
- Simple Snack: Honestly, it’s so good, you’ll often find yourself reaching for a slice straight from the counter for a quick and satisfying snack.
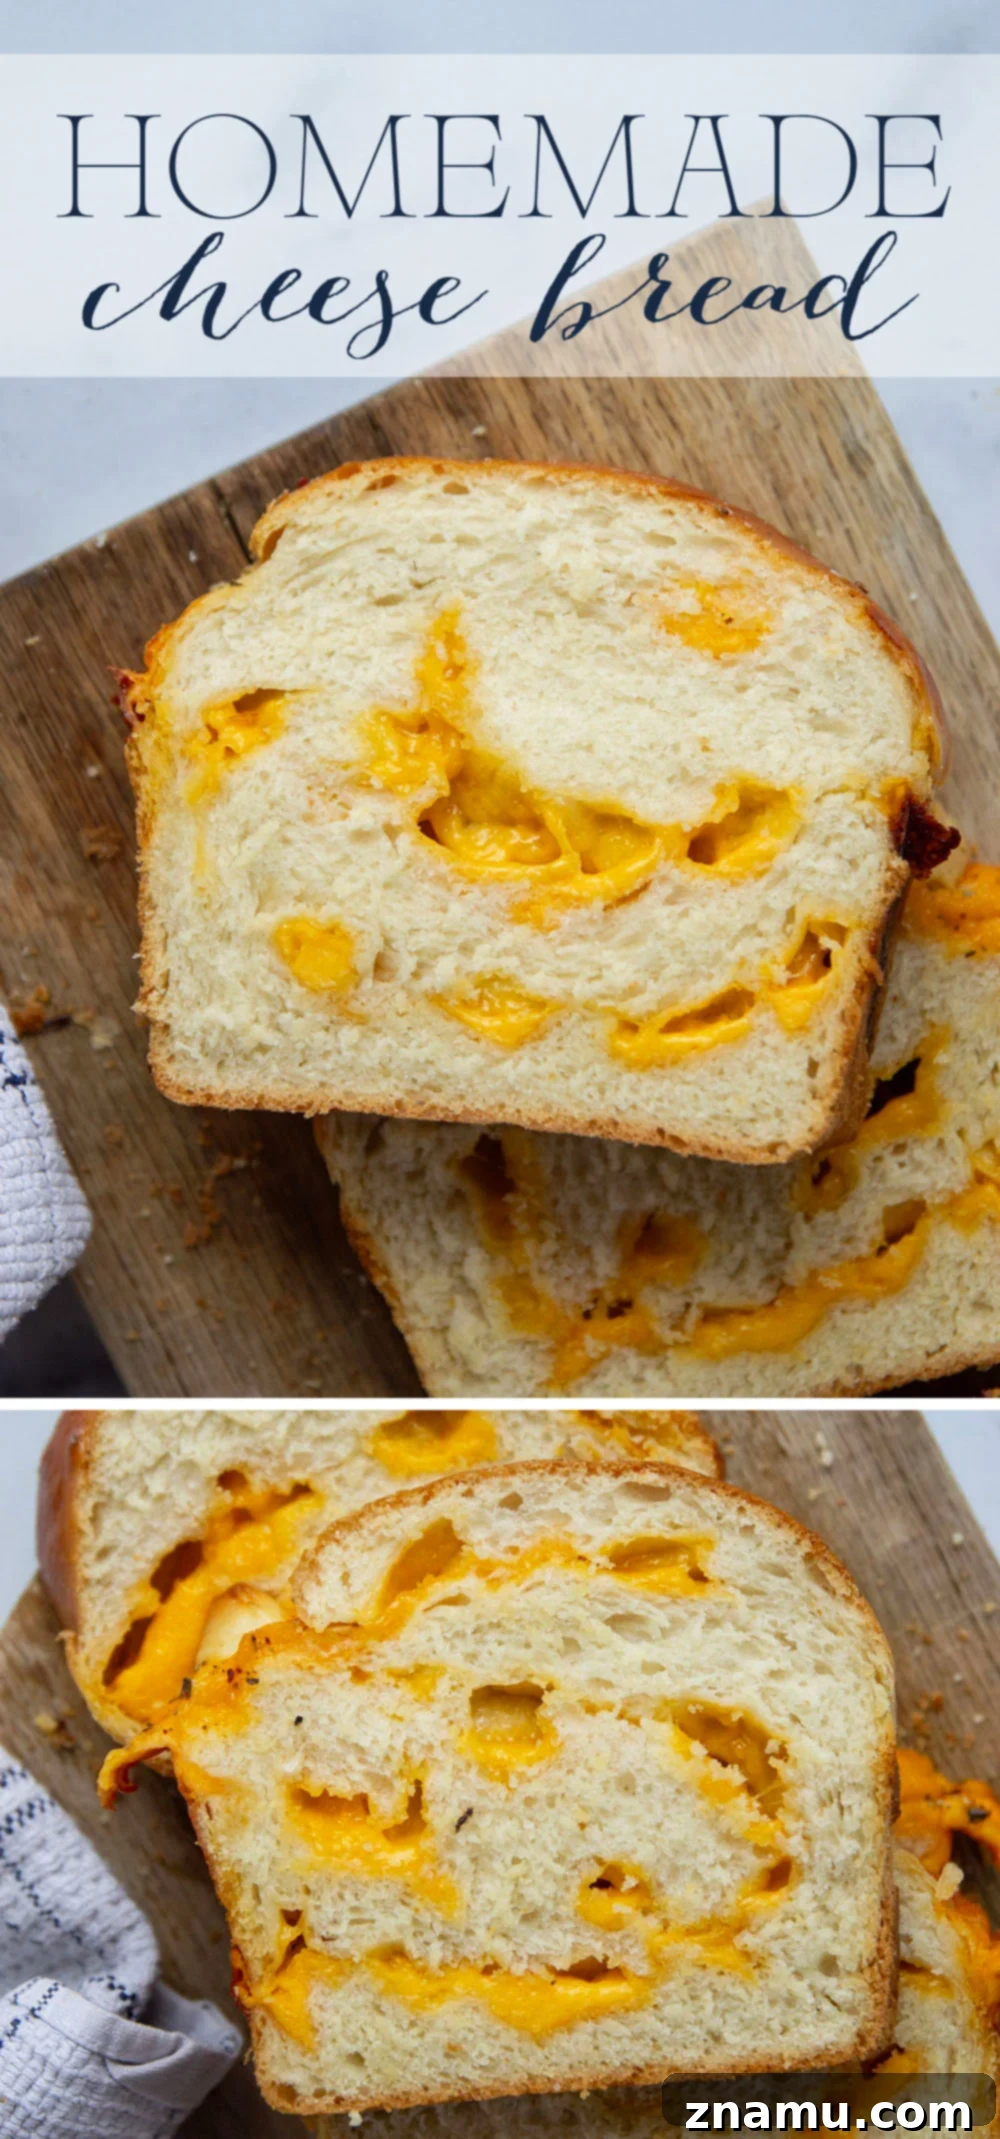
Once you bring this incredible homemade cheese bread into your home, be warned: it has a mysterious way of disappearing almost instantly! Our family can attest to its incredible appeal; a fresh loaf rarely lasts more than a few minutes. And honestly, with those mesmerizing, gooey cheese swirls, can you blame anyone?
Homemade Cheese Bread Recipe Card
This recipe may include paid links. As an Amazon Associate, I earn a commission from qualifying purchases.
Homemade Cheese Bread
Perfectly soft and fluffy and swirled with pockets of gooey cheddar cheese, this homemade cheese bread is easy to make and a fun baking project!

Prep Time: 30 minutes
Cook Time: 35 minutes
Rising Time: 2 hours 15 minutes
Total Time: 3 hours 20 minutes
Servings: 12 servings
Calories: 228 kcal per serving
Ingredients
Bread Dough
- 1 cup warm water (105-115°F / 40-46°C)
- 2-1/4 teaspoons active dry yeast
- 2 tablespoons honey or agave nectar
- 1 large egg, lightly beaten
- 4 tablespoons unsalted butter, melted and cooled
- 1 teaspoon kosher salt
- 3 to 3-1/2 cups bread flour (plus more for dusting)
- 8 oz block cheddar cheese, cut into 1/4-inch cubes
- 1 large egg white, beaten with 1 tablespoon water (for egg wash)
Garlic Herb Butter
- 1 tablespoon unsalted butter
- 1 small clove garlic, minced
- 1/4 teaspoon Italian seasoning
Instructions
Bread Dough
- In the bowl of a stand mixer fitted with a dough hook (or a large bowl for hand kneading), add the warm water. Sprinkle the active dry yeast over the water and let it stand for 5 minutes until it becomes foamy. This confirms your yeast is active.
- Add the honey, lightly beaten egg, and melted butter to the yeast mixture. Mix until well combined and smooth. Stir in the kosher salt. Gradually add 3 cups of bread flour to the bowl and mix on low speed (or with a wooden spoon by hand) until the dough starts to pull away from the sides of the bowl. If the dough still feels too wet and sticky, add additional flour one tablespoon at a time until it forms a soft, cohesive dough.
- If using a stand mixer, continue to knead the dough on low speed for 5-7 minutes until it is stretchy and elastic. If kneading by hand, turn the dough onto a lightly floured surface and knead manually for about 10 minutes until it achieves the same stretchy and elastic consistency.
- Transfer the kneaded dough to a lightly greased bowl, turning it once to ensure the top is also lightly greased. Cover the bowl tightly with plastic wrap or a clean kitchen towel. Place it in a warm, draft-free place at room temperature and let it rise for 1 to 1.5 hours, or until the dough has visibly doubled in size.
- While the dough is rising, lightly grease a 9×15 inch loaf pan. Once the dough has risen, gently punch it down to deflate. Turn the dough out onto a lightly floured surface and, using a rolling pin, roll it into an approximate 9×15 inch rectangle.
- Evenly scatter the cubed cheddar cheese over the entire surface of the dough rectangle, leaving about a 1/2-inch border along one of the longer edges. Starting from the opposite longer edge, tightly roll the dough up into a log. Firmly pinch the ends and the seam to seal.
- Using a sharp knife, carefully cut the dough log in half vertically, lengthwise. Gently twist the two halves together, intertwining them to create a braided effect. Pinch the ends firmly to secure. Carefully transfer the twisted loaf into your prepared loaf pan, tucking any loose ends underneath.
- Cover the loaf again with plastic wrap or a clean kitchen towel and let it rise in a warm place at room temperature for another 30-45 minutes, or until the loaf appears puffy and nearly doubled in size in the pan.
- Preheat your oven to 375°F (190°C). Once the loaf has completed its second rise, gently brush the top with the egg wash (1 egg white beaten with 1 tablespoon water) for a golden crust.
- Bake in the preheated oven for 30-35 minutes. Keep an eye on the bread; if the top starts browning too quickly, loosely tent it with a piece of aluminum foil. The bread is done when it’s beautifully golden brown and an instant-read thermometer inserted into the center registers an internal temperature of 190-200°F (88-93°C).
Garlic Herb Butter
- While the bread is baking or just as it comes out, melt 1 tablespoon of unsalted butter in a small saucepan over medium heat. Add the minced garlic and Italian seasoning. Cook for about 1 minute, stirring constantly, until the garlic is fragrant (be careful not to burn it).
- Remove the garlic herb butter from the heat. As soon as the hot cheese bread comes out of the oven, immediately brush the fragrant butter generously over the entire warm loaf. This adds incredible flavor and shine to the crust.
- Allow the loaf to cool slightly on a wire cooling rack for at least 15-20 minutes before slicing and serving warm. Enjoy your magnificent homemade cheese bread!
Notes
Storing Instructions: Store leftover cheese bread in an airtight container or tightly wrapped at room temperature for up to 4 days. Reheat slices gently in a toaster or microwave for best texture.
Freezing Instructions: To freeze, ensure the bread is completely cooled. Wrap well in plastic wrap, then aluminum foil, and freeze for up to 2 months. Thaw on the counter, then reheat at 350°F (175°C) for 10-15 minutes or until warmed through.
Nutrition Information (per serving)
Serving: 1 slice bread
Calories: 228 kcal
Carbohydrates: 22.5g
Protein: 8.1g
Fat: 11.8g
Saturated Fat: 7.2g
Cholesterol: 48mg
Potassium: 66mg
Fiber: 0.8g
Sugar: 3.1g
Calcium: 146mg
Iron: 2mg
Explore More Yeast Bread Baking Projects!
If you’ve enjoyed the rewarding process of baking this cheese bread, you might be ready to tackle another delicious yeast bread recipe. Expand your baking repertoire with these fantastic options:
- Cheesy Pizza Focaccia Breadsticks: A delightful blend of pizza flavor and fluffy focaccia.
- Hearty Honey Oat Bread: A wholesome and slightly sweet bread, perfect for sandwiches.
- Classic Challah Bread: Learn to braid this beautiful, rich, and slightly sweet Jewish egg bread.
This post was updated with new recipe tips and photos on August 1, 2024, to provide the most comprehensive and delightful baking experience possible.