
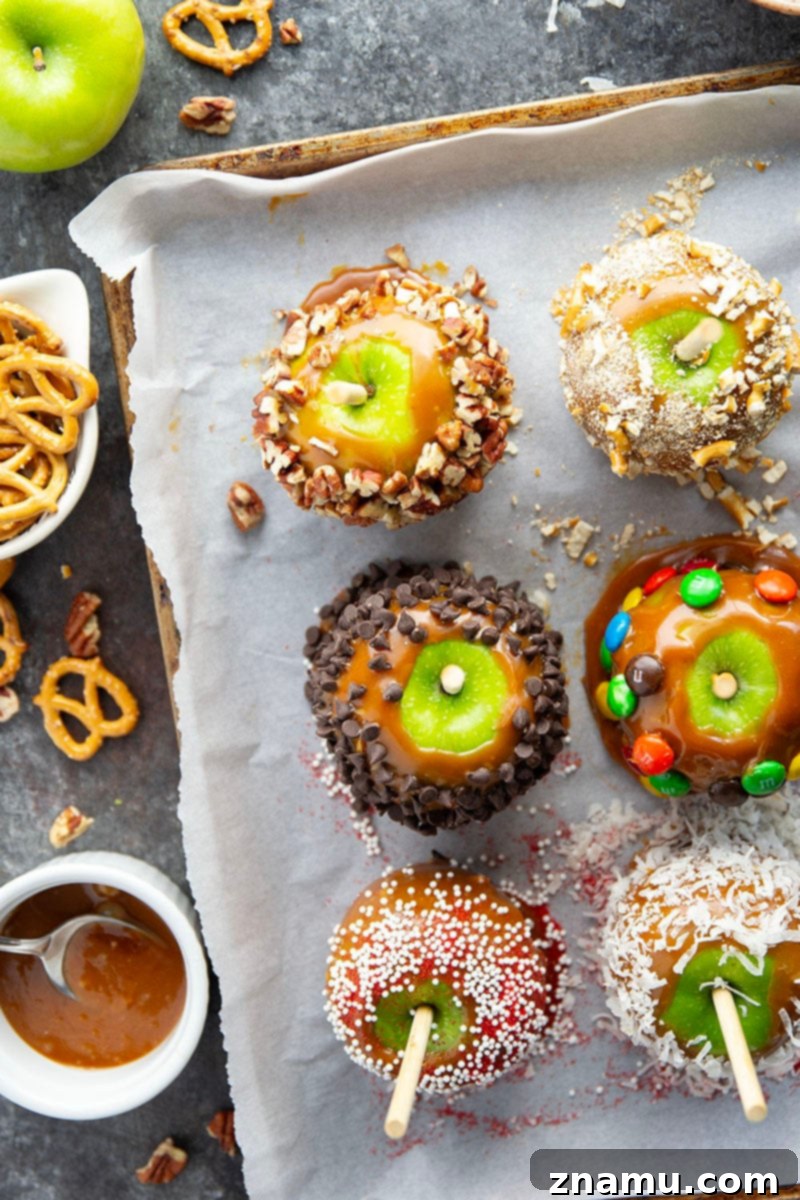
Indulge in the ultimate fall treat with these deluxe homemade caramel apples, featuring a rich, velvety caramel sauce and an array of exciting toppings!
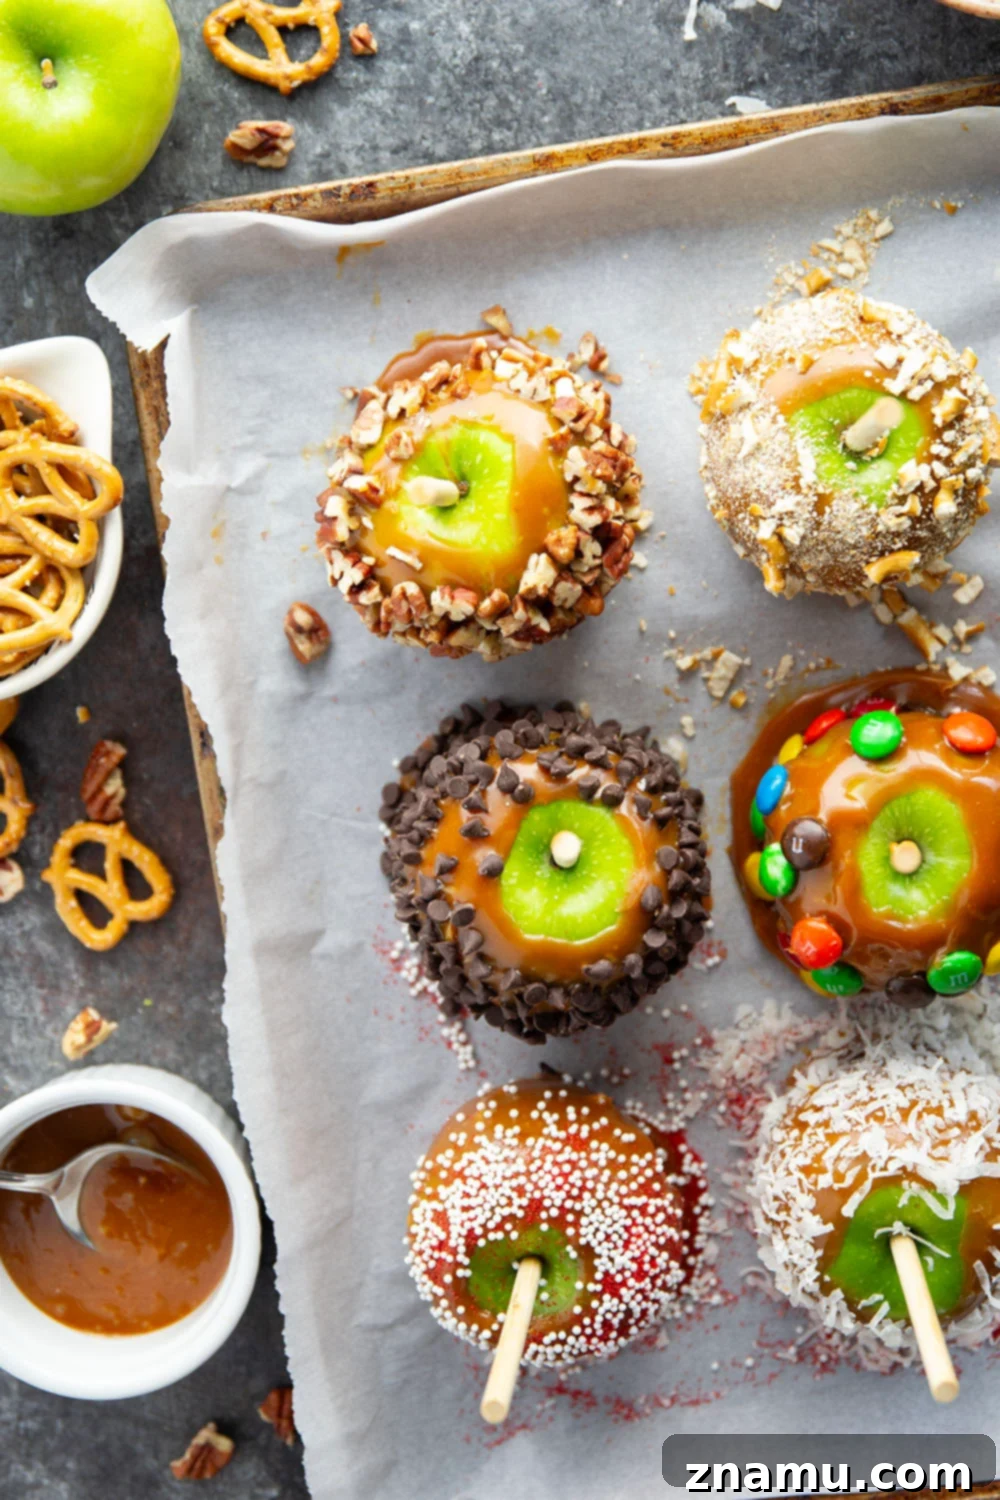
Elevate Your Autumn Experience with Deluxe Homemade Caramel Apples
As the vibrant hues of autumn emerge and a crisp, refreshing breeze sweeps through the air, there’s an undeniable charm to classic fall treats. Among them, caramel apples stand out as a nostalgic favorite, evoking memories of hayrides, pumpkin patches, and festive gatherings. However, this recipe isn’t just about recreating a classic; it’s about elevating it to an extraordinary, deluxe version that promises to be the culinary highlight of your autumn season. Prepare to transform humble apples into gourmet delights right in your own kitchen.
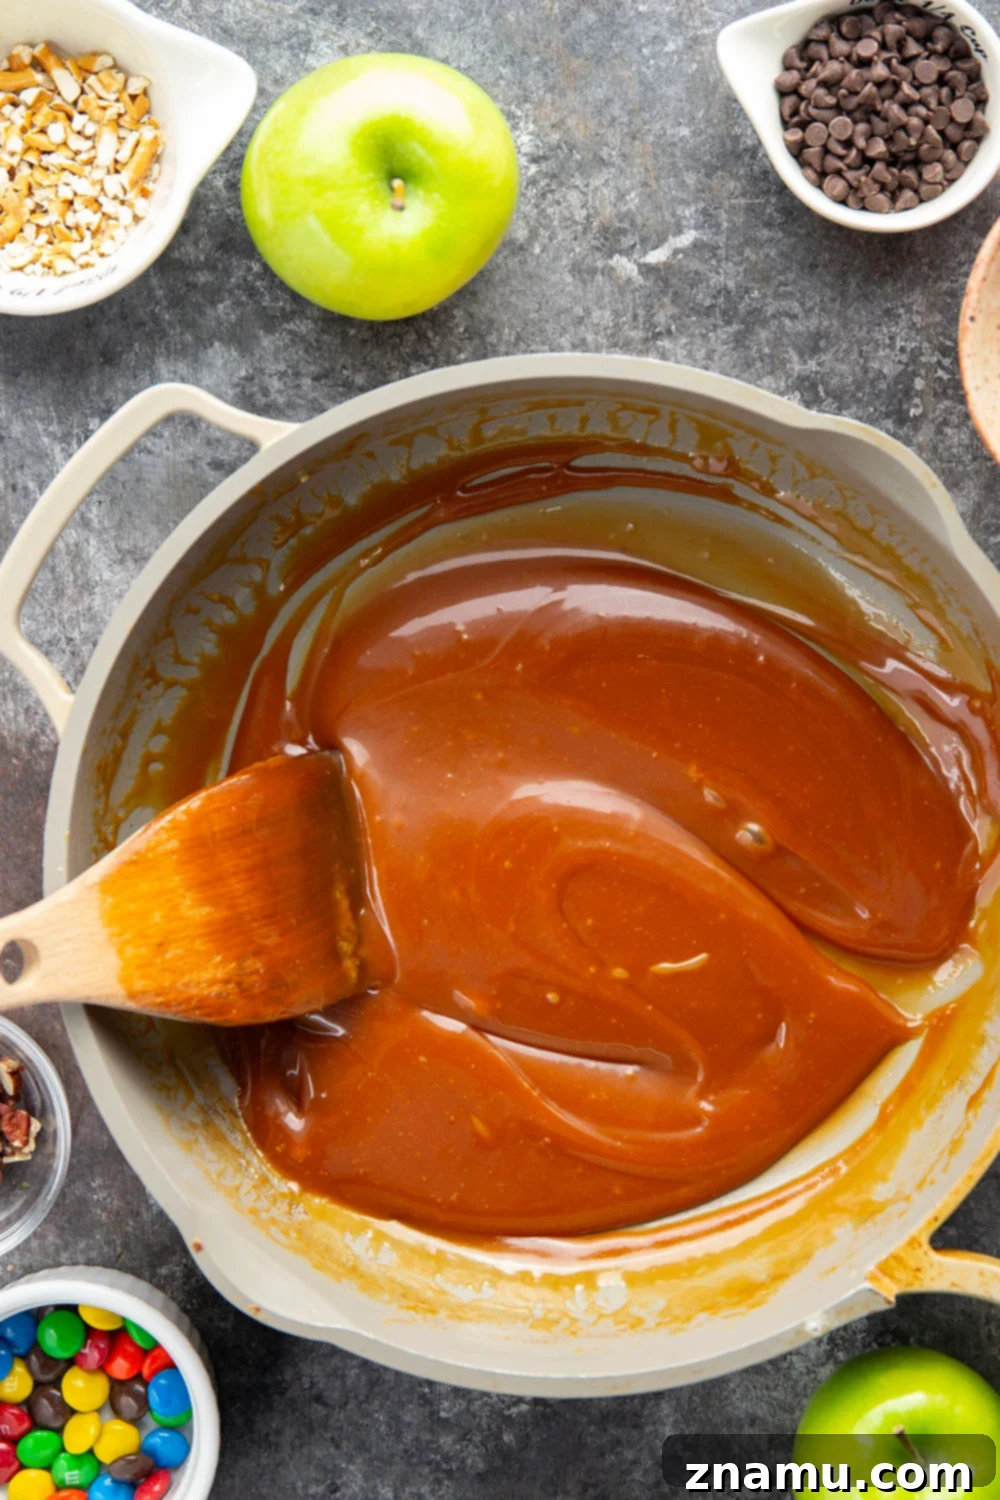
The foundation of these truly exceptional caramel apples lies in a meticulously crafted homemade salted caramel sauce. This isn’t your average store-bought coating; it’s a luscious, gooey masterpiece, rich with deep buttery notes and a delicate hint of sea salt that balances the sweetness perfectly. So intensely flavorful and velvety smooth, you’ll be hard-pressed not to enjoy it straight from the pan. Mastering this caramel might sound intimidating, but with our straightforward instructions, you’ll achieve a glossy, perfectly chewy sauce every single time.
Beyond the unparalleled caramel, we dive into a universe of creative toppings. While we offer a curated list of six fantastic suggestions to get you started, the possibilities for customization are truly limitless. Imagine crisp apples enrobed in golden caramel, then adorned with crunchy nuts, salty pretzels, colorful candies, or rich chocolate drizzles. These gourmet caramel apples aren’t just desserts; they are an interactive culinary experience, perfect for involving family and friends in the creative process, making every bite a personalized adventure.
What Makes These Homemade Caramel Apples So Special?
- A supremely rich and silky homemade salted caramel sauce that beautifully coats every inch of the apple, providing a perfect balance of sweet and savory.
- Perfectly crisp and tart Granny Smith apples, which offer the ideal bright counterpoint to the deep, sweet caramel.
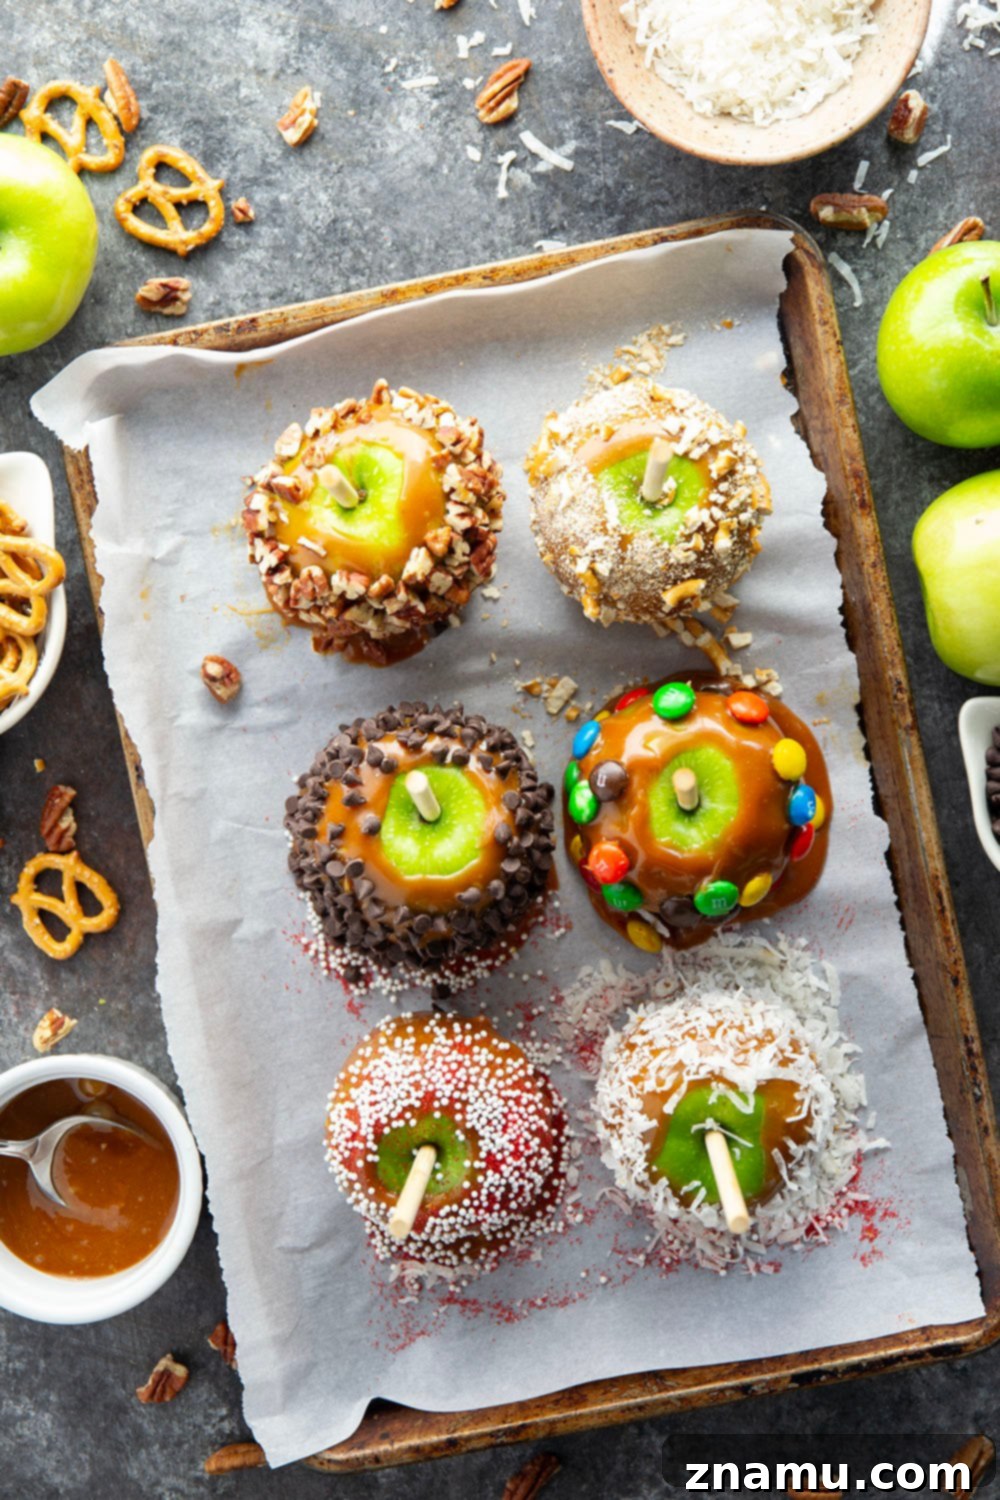
- An impressive variety of exciting toppings, including beloved classics like crushed pretzels, assorted nuts, M&Ms, vibrant sprinkles, mini chocolate chips, and toasted coconut flakes, ensuring a personalized treat for every palate.
- Expert tips and proven techniques designed to guarantee a smooth, professional finish, elevating your homemade caramel apples from a simple snack to a truly gourmet dessert.
Crafting Your Perfect Caramel Apple: A Step-by-Step Guide
Embarking on the journey to create these luxurious caramel apples is a rewarding and surprisingly accessible experience. While the full, printable recipe with precise measurements and detailed steps is conveniently located at the bottom of this post, let’s explore the key ingredients and essential techniques that will ensure your success and transform your kitchen into a caramel apple workshop.
Essential Ingredients for Gourmet Caramel Apples
The secret to an exceptional caramel apple lies in the quality and balance of its core ingredients. To achieve that unparalleled homemade flavor and perfectly chewy texture, ensure you gather the following high-quality components:
- Granny Smith Apples: These are the star of the show. Their firm texture and distinct tartness are crucial for cutting through the richness of the caramel, creating a balanced flavor profile.
- Granulated Sugar: The sweet cornerstone of our exquisite caramel sauce. It melts down to form the golden base.
- Unsalted Butter: Adds an incredible richness and helps prevent the sugar from crystallizing, contributing to the caramel’s wonderfully silky-smooth consistency.
- Heavy Whipping Cream: Indispensable for achieving that luxurious, creamy texture and a deep, decadent caramel flavor that clings perfectly to your apples.
- Kosher Salt: A vital ingredient that elevates the caramel. Just a half teaspoon provides a crucial counterpoint to the sweetness, enhancing the overall depth and complexity of the flavor.
- Your Choice of Toppings: This is where your personal flair comes in! Prepare a selection of your favorite crunchy, sweet, or savory additions to adorn your apples (more detailed ideas below).
Selecting the Ideal Apples for Dipping
The choice of apple is more than just a preference; it’s a critical decision that impacts the entire caramel apple experience. For this deluxe recipe, we strongly advocate for Granny Smith apples. Their signature characteristics—an intensely crisp texture and a bright, tart flavor—create a phenomenal contrast with the sweet, gooey caramel. This delightful juxtaposition prevents the treat from being overly sweet and ensures a refreshing bite that keeps your taste buds engaged.
However, if the pronounced tartness of Granny Smith apples isn’t quite what you’re craving, several other firm apple varieties make excellent substitutes. Honeycrisp apples are a fantastic alternative, offering a superb sweet-tart balance and an exceptionally crisp bite. Gala apples provide a milder sweetness and a firm, juicy texture that pairs beautifully with caramel. No matter your choice, ensure your apples are fresh, free of blemishes, and thoroughly cleaned. It’s also important to vigorously wash and dry them to remove any natural waxy coating, as this allows the caramel to adhere properly without slipping off.
Expert Tips for Crafting Flawless Caramel Apples
Achieving perfectly coated, beautifully topped caramel apples worthy of a gourmet shop is entirely within your reach with these invaluable professional tips. Pay close attention to these details for an undeniably impressive result:
- Utilize a Heavy-Bottomed Saucepan for Caramel Perfection: This step is paramount for successful caramel making. A thick, heavy-bottomed saucepan is designed to distribute heat evenly across its surface. This uniform heat is crucial for preventing hot spots, which can lead to uneven cooking, sugar burning, or crystallization – all common pitfalls in caramel production. An even heat ensures a smooth, consistent caramel that cooks to perfection without complications.
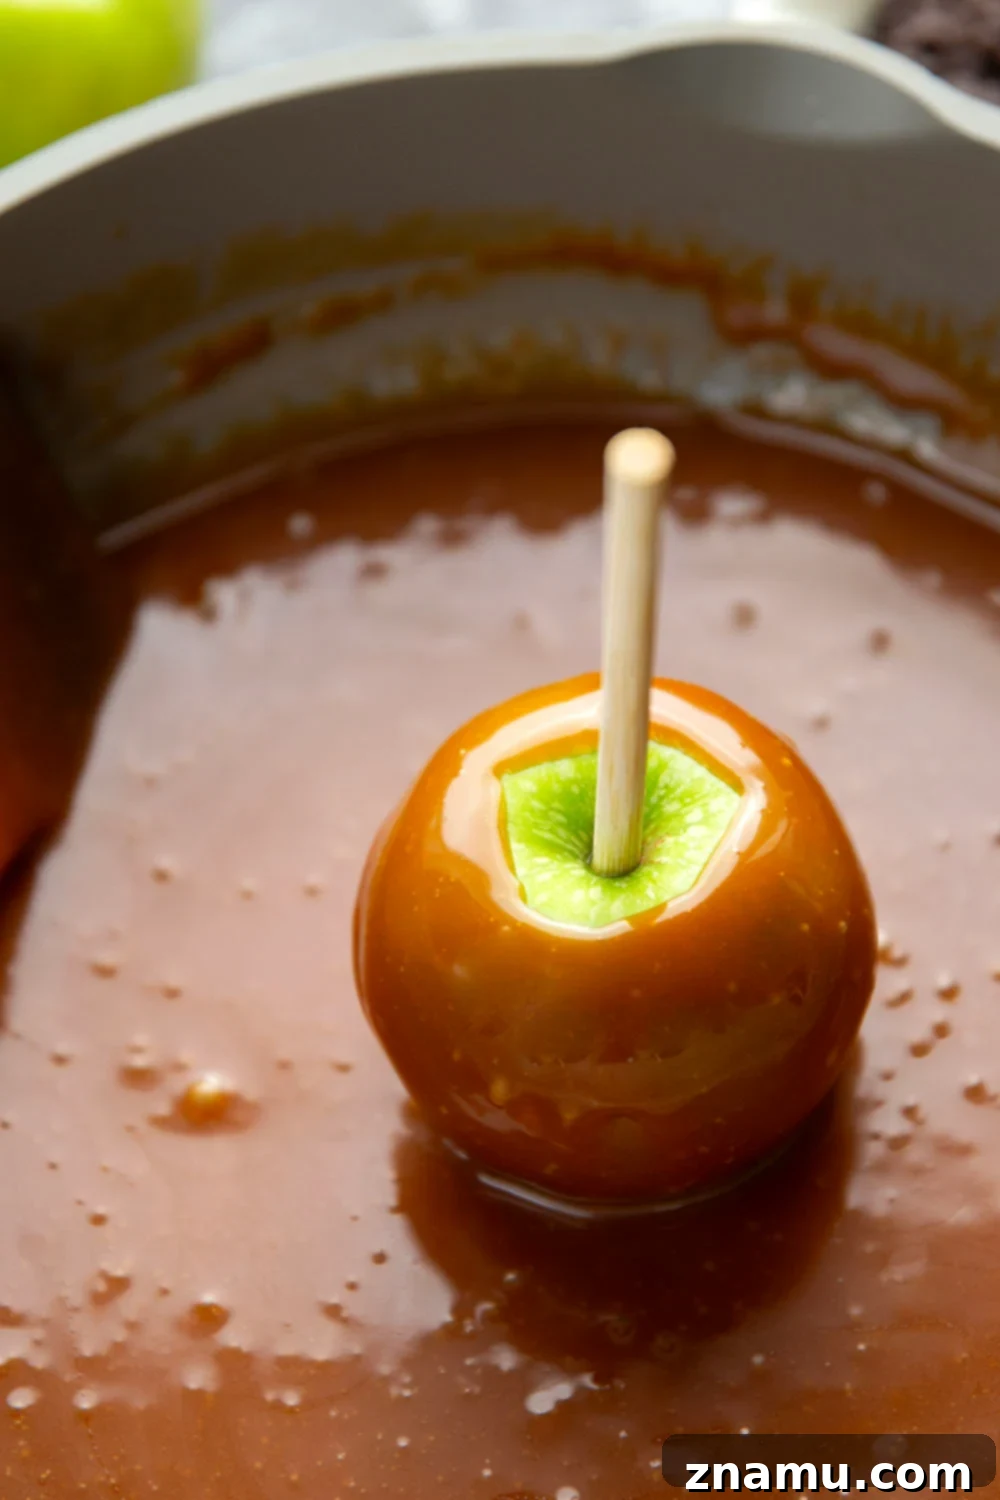
- Allow Your Caramel a Crucial Cooling Period: Once your caramel is cooked and removed from the heat, resist the urge to dip immediately. Instead, let it cool for approximately 10 minutes. This resting period is vital; it allows the caramel to thicken slightly to the ideal viscosity. If the caramel is too hot and thin, it will simply run off the apples, leaving a sparse coating. Should your caramel cool too much and become excessively thick, a gentle reheat over very low heat for a minute or two will restore its perfect dipping consistency.
- Chill Your Apples for Rapid Setting: A simple yet highly effective trick for a pristine finish is to chill your prepared apples in the refrigerator before you begin dipping. The cold surface of the apple acts quickly to set the warm caramel upon contact, drastically reducing drips and ensuring a beautifully even, firm coating. Skipping this step often results in messy, unevenly coated apples.
- Act Swiftly When Applying Toppings: As soon as an apple is dipped in the warm caramel, the clock starts! The caramel will begin to set quite rapidly, especially on chilled apples. Therefore, it is absolutely essential to have all your desired toppings prepared, crushed, and laid out in shallow dishes or plates before you even begin dipping. Immediately after coating an apple in caramel, roll or sprinkle it generously with your chosen toppings while the caramel is still soft and wonderfully tacky, ensuring maximum adhesion.
- Prepare Your Apples Meticulously: Beyond chilling, ensure your apples are thoroughly washed to remove any dirt or lingering pesticides. For apples purchased from a grocery store, a quick scrub with warm water and a little white vinegar can effectively remove any artificial waxy coating, which is a major culprit for caramel not sticking. Pat each apple completely dry with a paper towel before inserting your sticks.
- Securely Insert Apple Sticks: Choose sturdy wooden or bamboo skewers, or opt for specialized caramel apple sticks. Insert them firmly into the core of each apple, pushing about two-thirds of the way through. This creates a stable and secure handle, essential for easy dipping and a comfortable eating experience.
Unleash Your Creativity: Gourmet Topping Ideas
This is where the fun truly begins, transforming your homemade caramel apples into a customizable, deluxe array of treats! While the classic pairing of caramel and apple is inherently delicious, adding a variety of textures and complementary flavors elevates the experience to new heights. Here are some inspiring and unique ideas, expanding beyond our initial suggestions, to help you craft truly unforgettable gourmet caramel apples:
- Crushed Toffee Bits: For an irresistible buttery crunch and a deep, caramelized flavor that perfectly complements the apple and caramel.
- Finely Chopped Toasted Nuts: Toasted hazelnuts, walnuts, pecans, or almonds add a wonderful warm, earthy flavor and satisfying textural contrast. Toasting them briefly enhances their aroma and crunch.
- Decadent Chocolate Drizzles: Elevate the elegance with a generous drizzle of melted dark chocolate, creamy white chocolate, or classic milk chocolate. A delicate zigzag pattern offers a beautiful, professional finish.
- Sweet & Spicy Cinnamon Sugar: A simple yet incredibly effective coating for those who appreciate a warming hint of spice alongside their sweet caramel.
- Crushed Cookies & Crackers:
- Crushed Oreos: A beloved choice for the ultimate cookies and cream caramel apple.
- Crushed Gingersnaps: A fantastic option for a spicy, aromatic note that screams autumn comfort.
- Crushed Graham Crackers: Evokes a nostalgic s’mores-like flavor, especially divine when paired with a chocolate drizzle and mini marshmallows.
- Mini Marshmallows & Graham Cracker Crumbs: Combine these with a chocolate drizzle for a delightful, gooey S’mores caramel apple – a true crowd-pleaser.
- Flaky Sea Salt: A delicate sprinkle of high-quality flaky sea salt on top of the caramel (while it’s still slightly soft) intensely enhances the “salted caramel” flavor, providing a sophisticated and irresistible finish.
- Finely Chopped Dried Fruit: Introduce a chewy texture and a burst of tart sweetness with finely chopped dried cranberries, cherries, or even apricots.
- Whimsical Cereal Crumbs: For a fun and playful touch, consider crushing kid-friendly cereals like Cinnamon Toast Crunch or even colorful Fruity Pebbles.
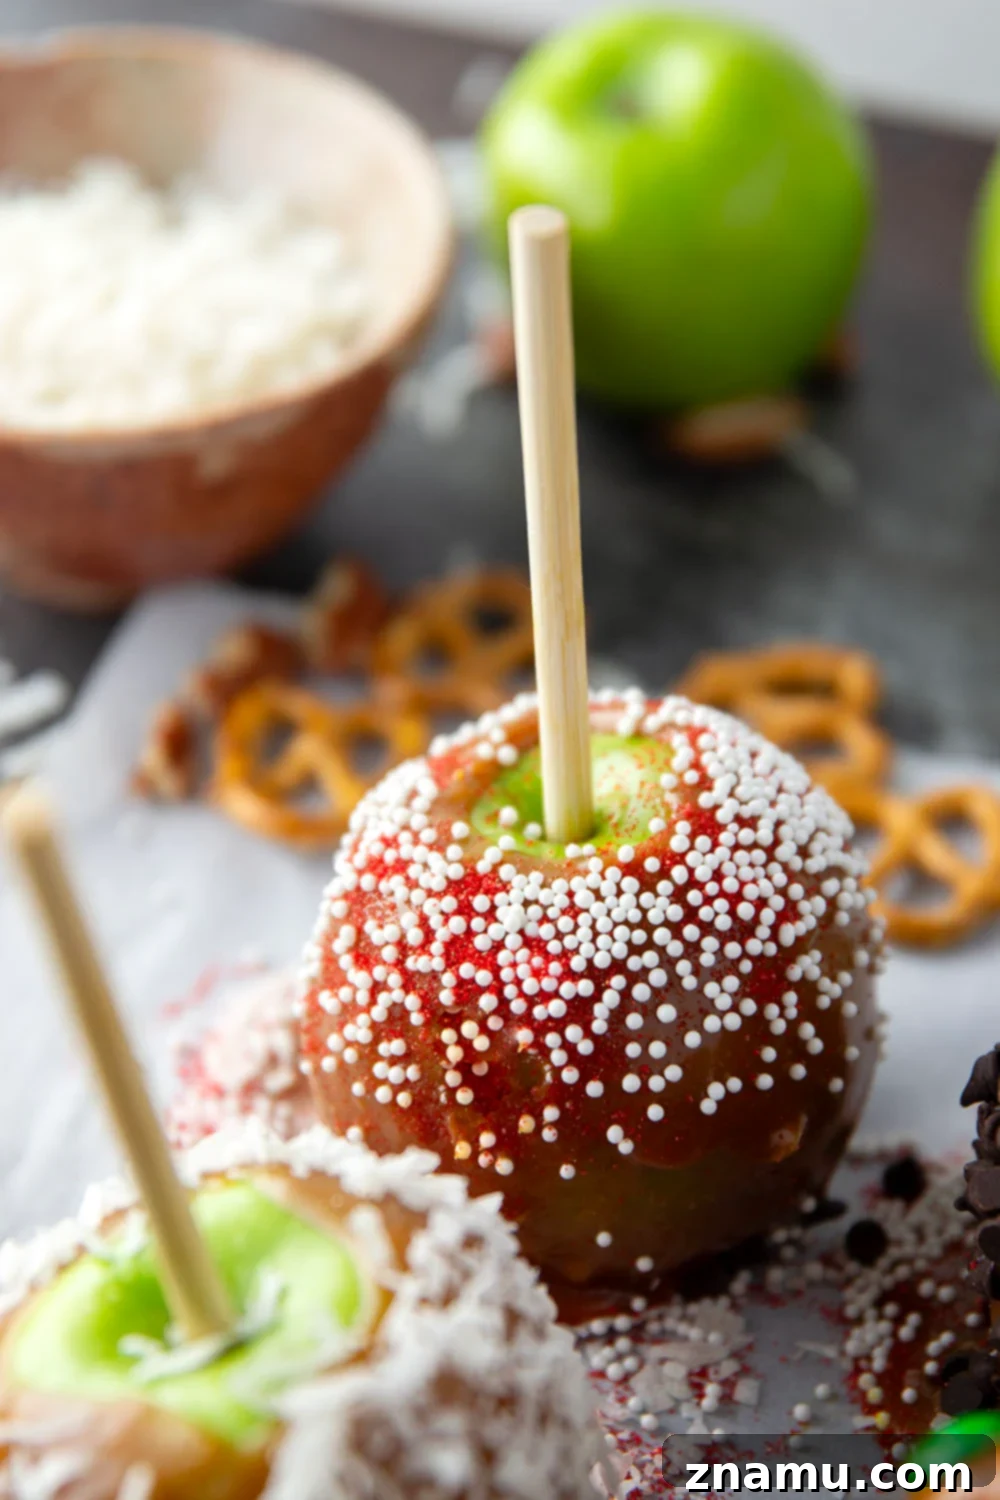
The true magic of these toppings lies in the interactive experience they create. Set out an array of bowls filled with different toppings, and encourage everyone – especially children – to unleash their creativity and build their own personalized caramel apple masterpieces. It’s an ideal activity for fall festivals, Halloween parties, or simply a fun and memorable afternoon spent in the kitchen. With such delicious ingredients, there’s truly no way to go wrong when creating these gourmet treats!
Serving and Storing Your Gourmet Creation
Once your deluxe caramel apples are beautifully coated and adorned with their chosen toppings, allow them a moment to set. This typically takes about 20 minutes at room temperature, or you can expedite the process by placing them in the refrigerator. For the best flavor and texture, these treats are most enjoyable when served fresh, while the caramel is still delightfully pliable and the apple retains its crispness. You can enjoy them directly on their stick, or for a more refined and easier eating experience, carefully slice them into wedges with a sharp, sturdy knife (exercising caution around the stick).
Should you have the delightful problem of leftovers, or if you wish to prepare these ahead of time, proper storage is key to maintaining their quality. Store your homemade caramel apples individually wrapped in parchment paper or plastic wrap. This prevents them from sticking to each other and protects the caramel. Place the wrapped apples in an airtight container in the refrigerator, where they will maintain their deliciousness for up to 6 days. For optimal enjoyment, remove them from the refrigerator about 15-20 minutes before serving. This brief period at room temperature will allow the caramel to soften slightly, making for a more pleasurable bite without being too hard.
We encourage you to save this recipe using the ‘save to recipe box’ button found within the recipe card below. If you create these incredible caramel apples, we would be absolutely thrilled to hear about your experience! Please take a moment to leave a comment and a star rating below. Additionally, consider sharing a photo of your culinary creation on Instagram and tag us @wholeandheavenlyoven or use the hashtag #wholeandheavenlyoven. Your feedback and shares mean the world to us!

Discover More Fall Apple Favorites
If your love for apples extends beyond these delightful caramel treats, be sure to explore these other heartwarming and delicious autumn recipes:
- Caramel Apple Oatmeal Cookies
- Apple Dumplings with Browned Butter Salted Caramel Sauce
- Apple Slab Pie

Deluxe Homemade Caramel Apples
Dipped in a rich homemade caramel sauce and coated in a variety of fun toppings, these homemade caramel apples truly are the deluxe version of a fall classic!
This recipe may include paid links. As an Amazon Associate, I earn a commission from qualifying purchases.
Prep Time: 20 minutes
Total Time: 20 minutes
Servings: 6 servings
Calories: 413 kcal per serving (calculated without optional toppings)
Ingredients
- 6 medium Granny Smith apples, chilled
- 1 cup granulated sugar
- 6 tablespoons unsalted butter, softened
- 2/3 cup heavy whipping cream
- 1/2 teaspoon kosher salt
- Optional toppings for coating apples: crushed pretzels, mini chocolate chips, M&Ms, flaked coconut, toasted chopped pecans, and sprinkles.
Instructions
- Push a caramel apple stick into the core of each apple and place them on a parchment paper-lined sheet pan. Place the apples in the refrigerator to keep them cold while you prepare the caramel sauce.
- In a medium heavy-bottomed saucepan, place the granulated sugar over medium heat and allow it to melt, stirring frequently with a heat-proof spatula or wooden spoon to prevent burning and ensure even melting. Once completely melted and amber in color, whisk in the softened unsalted butter until fully incorporated. Bring the mixture to a boil. Slowly and carefully add the heavy whipping cream (be cautious, as the mixture will bubble up and splatter), whisking constantly. Continue to cook, whisking, until the caramel turns a rich golden brown and thickens, which typically takes about 2-3 minutes. Remove the caramel from the heat and stir in the kosher salt.
- Allow the freshly made caramel sauce to cool for 10 minutes. This cooling time will help it thicken to the perfect consistency for dipping. Spoon the warm caramel over the chilled apples, swirling each apple to evenly coat its surface. Place the coated apples back onto the parchment paper-lined sheet pan.
- Immediately after coating with caramel, roll or sprinkle the apples with your chosen optional toppings while the caramel is still soft and tacky. Allow the coated apples to set for at least 20 minutes before serving. For best results and longer shelf life, store caramel apples in the refrigerator until ready to enjoy.
Notes
Storing Instructions: Store finished caramel apples individually wrapped in parchment paper or plastic wrap in the refrigerator for up to 6 days. For optimal enjoyment, let them sit at room temperature for 15-20 minutes before serving to slightly soften the caramel.
Nutrition
Serving: 1 caramel apple (calculated without optional toppings)
- Calories: 413 kcal
- Carbohydrates: 59g
- Protein: 1g
- Fat: 21g
- Saturated Fat: 13g
- Polyunsaturated Fat: 1g
- Monounsaturated Fat: 5g
- Trans Fat: 0.5g
- Cholesterol: 60mg
- Sodium: 205mg
- Potassium: 224mg
- Fiber: 4g
- Sugar: 53g
- Vitamin A: 837 IU
- Vitamin C: 9mg
- Calcium: 32mg
- Iron: 0.3mg
Tried this recipe?
Leave a comment and rating below. Feel free to share a picture on Instagram and tag @wholeandheavenlyoven or hashtag it #wholeandheavenlyoven
This post was updated with new recipe adjustments and photos on 9/9/25.